---
myst:
html_meta:
description: Install Ubuntu Server via UEFI PXE netboot on ARM (aarch64/arm64) and x86_64 (amd64) architectures using the live server installer.
---
(netboot-the-server-installer-via-uefi-pxe-on-arm-aarch64-arm64-and-x86-64-amd64)=
# Netboot the server installer via UEFI PXE on ARM (aarch64, arm64) and x86_64 (amd64)
This document describes the steps to install a system via netbooting and the live server installer (Subiquity) in UEFI mode with Ubuntu 20.04 (or later).
This process applies to both arm64 and {term}`amd`64 architectures and is based on [this Ubuntu Discourse post for legacy mode netbooting](https://discourse.ubuntu.com/t/netbooting-the-live-server-installer/14510) (UEFI's predecessor). Focal (20.04, 20.04.5) and Groovy (20.10) have been tested with this method.
## Configure TFTP
This article assumes that you have set up your Trivial File Transfer Protocol (TFTP) (and/or {term}`DHCP`/bootp if necessary, depending on your LAN configuration) by following [the netbooting method for legacy mode](https://discourse.ubuntu.com/t/netbooting-the-live-server-installer/14510). Alternatively, you can set up your own TFTP server as follows if your {term}`DNS` and DHCP are already configured:
```
$ sudo apt install tftpd-hpa
```
After installation, check that the TFTP service is active:
```
$ systemctl status tftpd-hpa.service
```
The output should show **active (running)**. This article assumes your TFTP root path is `/srv/tftp`.
## How to serve files
You can **skip this entire section** by using [this non-official tool](https://github.com/dannf/ubuntu-server-netboot). The tool will set up your TFTP server to serve the necessary files for netbooting.
### Necessary files
The following files are needed for this process:
- Ubuntu live server image:
- For arm64 architectures, the image name has the suffix `-arm64`. For example, `ubuntu-20.04.5-live-server-arm64.iso`.
- For amd64 architectures, the image name has the suffix `-amd64`. For example, `ubuntu-20.04.5-live-server-amd64.iso`.
- GRUB {term}`EFI` binary (and the corresponding `grub.cfg` text file):
- For arm64 architectures, this is called `grubnetaa64.efi.signed`.
- For amd64 architectures, this is called `grubnetx64.efi.signed`.
- `initrd` extracted from your target Ubuntu live server image (use `hwe-initrd` instead if you want to boot with the HWE kernel).
- `vmlinuz` extracted from your target Ubuntu live server image (use `hwe-vmlinuz` instead if you want to boot with the HWE kernel).
### Examples
In the following sections, we will use an arm64 image as an example. This means the following files are used:
- Ubuntu 20.04.5 live server image [ubuntu-20.04.5-live-server-arm64.iso](https://cdimage.ubuntu.com/ubuntu/releases/20.04.5/release/ubuntu-20.04.5-live-server-arm64.iso)
- GRUB EFI binary [grubnetaa64.efi.signed](https://ports.ubuntu.com/ubuntu-ports/dists/focal/main/uefi/grub2-arm64/current/grubnetaa64.efi.signed)
- `initrd` extracted from `ubuntu-20.04.5-live-server-arm64.iso`
- `vmlinuz` extracted from `ubuntu-20.04.5-live-server-arm64.iso`
Replace the corresponding files if you want to work on an amd64 image. For example, your files may be:
- Ubuntu 20.04.5 live server image [ubuntu-20.04.5-live-server-amd64.iso](https://old-releases.ubuntu.com/releases/20.04.5/ubuntu-20.04.5-live-server-amd64.iso)
- GRUB EFI binary [grubnetx64.efi.signed](http://archive.ubuntu.com/ubuntu/dists/focal/main/uefi/grub2-amd64/current/grubnetx64.efi.signed)
- `initrd` extracted from `ubuntu-20.04.5-live-server-amd64.iso`
- `vmlinuz` extracted from `ubuntu-20.04.5-live-server-amd64.iso`
### Download and serve the GRUB EFI binary
The GRUB binary redirects the download path to the target files via `grub.cfg`. For more information about the Preboot Execution Environment (PXE) process and why this binary is required, see [the netbooting instructions for legacy mode](https://discourse.ubuntu.com/t/netbooting-the-live-server-installer/14510).
```
$ sudo wget https://ports.ubuntu.com/ubuntu-ports/dists/focal/main/uefi/grub2-arm64/current/grubnetaa64.efi.signed -O /srv/tftp/grubnetaa64.efi.signed
```
```{note}
Change **the archive distribution's name** from `Focal` to your target distribution name if needed.
```
### Download and serve more files
Download an Ubuntu ARM server ISO to fetch the installer, such as the [20.04.5 live server arm64 ISO](http://cdimage.ubuntu.com/ubuntu/releases/20.04.5/release/ubuntu-20.04.5-live-server-arm64.iso). The "live" prefix is required because the files needed are only available in the live version.
Mount the ISO and copy the target files we need over to the TFTP folder:
```
$ sudo mount ./ubuntu-20.04.5-live-server-arm64.iso /mnt
$ sudo mkdir /srv/tftp/grub /srv/tftp/casper
$ sudo cp /mnt/boot/grub/grub.cfg /srv/tftp/grub/
$ sudo cp /mnt/casper/initrd /srv/tftp/casper/
$ sudo cp /mnt/casper/vmlinuz /srv/tftp/casper/
```
So, the TFTP root folder should look like this now:
```
$ find /srv/tftp/
/srv/tftp/
/srv/tftp/grub
/srv/tftp/grub/grub.cfg
/srv/tftp/grubnetaa64.efi.signed
/srv/tftp/casper
/srv/tftp/casper/initrd
/srv/tftp/casper/vmlinuz
```
Customize the GRUB menu to install the target image by fetching it directly over the internet:
```
$ sudo chmod +w /srv/tftp/grub/grub.cfg
$ sudo vi /srv/tftp/grub/grub.cfg
```
Add a new boot entry at the top-level menu (not in any `submenu`):
```
menuentry "Install Ubuntu Server (Focal 20.04.5) (Pull the iso from web)" {
set gfxpayload=keep
linux /casper/vmlinuz url=http://cdimage.ubuntu.com/ubuntu/releases/20.04.5/release/ubuntu-20.04.5-live-server-arm64.iso only-ubiquity ip=dhcp ---
initrd /casper/initrd
}
```
In this configuration:
* `ip=dhcp` configures DHCP management for the lab environment
* `url` points to your target image download URL
Change these values according to your scenario.
When successful, you will enter the GRUB menu of the ephemeral live prompt. Select the entry you added to `grub.cfg` (`Install Ubuntu Server (Focal 20.04.5) (Pull the ISO from web)` in this example). After the ISO downloads, the Subiquity welcome message will appear.
## Appendix
### Check the serving file names
Verify that the target file name for `linux` and `initrd` is correct. The default `initrd` binary file name for 20.04.5 is `initrd`, while for 20.10 it is `initrd.lz`. Serving incorrect file names is a common troubleshooting issue.
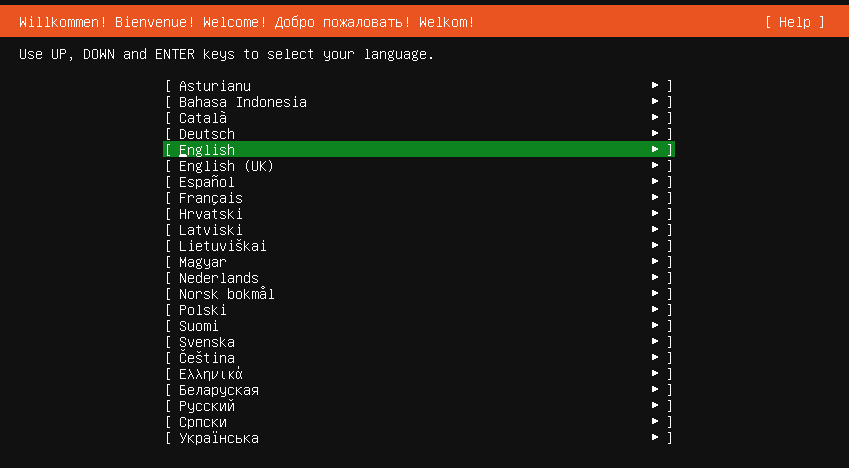
### Booting screenshots
With a correct setup, `grub.cfg` redirects the process to an ephemeral environment where your target image is downloaded and assigned in the GRUB entry. When you access the console or monitor of your target machine, you will see a screen like this:

Wait for the download to complete. If you see this Subiquity welcome page, the installer successfully launched via your UEFI PXE setup. Congratulations!